Cavity sliding doors are an excellent space-saving and aesthetic choice, offering seamless transitions between rooms. However, their successful installation depends on careful planning, particularly regarding the wall structure and surrounding elements. Whether you’re an architect specifying a high-end project, a builder ensuring structural integrity, or a homeowner planning your dream space, understanding the key considerations will help you achieve the best outcome.
1. Wall Makeup & Cavity Unit Considerations
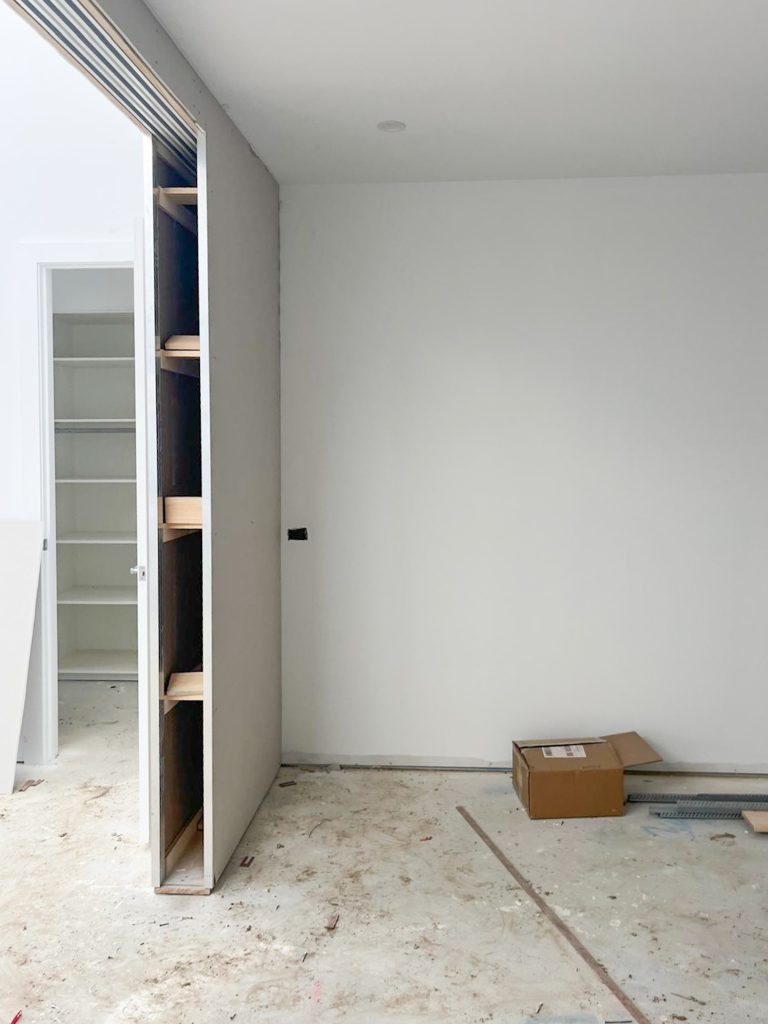
Before specifying or installing a pocket door system, assess the wall construction. The cavity pocket, where the door slides into, must be wide enough to house the door panel thickness specified with necessary clearance of between 6-10mm either side of the panel. This ensures the door panel doesn’t scrape or bind the inside of the pocket if the door happens to twist or bow [link to Door and Moisture article]. Here are key questions to ask:
What is the stud/framing thickness?
• Our standard cavity frame thickness is 90mm for majority of units.
• Where narrower frames are required our minimum stud thickness for a cavity slider is 76mm, suitable for a door panel up to 2040mm high and 820mm wide.
• A 64mm wall frame is too thin for any cavity pocket and door. You’ll need a 90mm frame or batten out the 64mm wall to match the 90mm cavity frame.
What wall lining will be used?
• Standard 10mm plasterboard is the most common lining.
• If using 13mm plasterboard, plywood, or tiles, the cavity unit must be manufactured to suit.
• Expressed finishes for skirting or other linings must be accounted for.
2. Cavity Pocket Strength & Surrounding Joinery
One of the most common issues with sliding doors is bowing of the cavity pocket wall due to external pressure from joinery. If cabinetry, vanities, or built-in furniture is installed against the cavity pocket:
• Ensure the pocket is reinforced to prevent deformation.
• Maintain a gap between the joinery and cavity pocket to prevent pressure on the structure.
• We’ve seen cases where joinery pushed against the pocket wall, causing doors to scrape or jam.
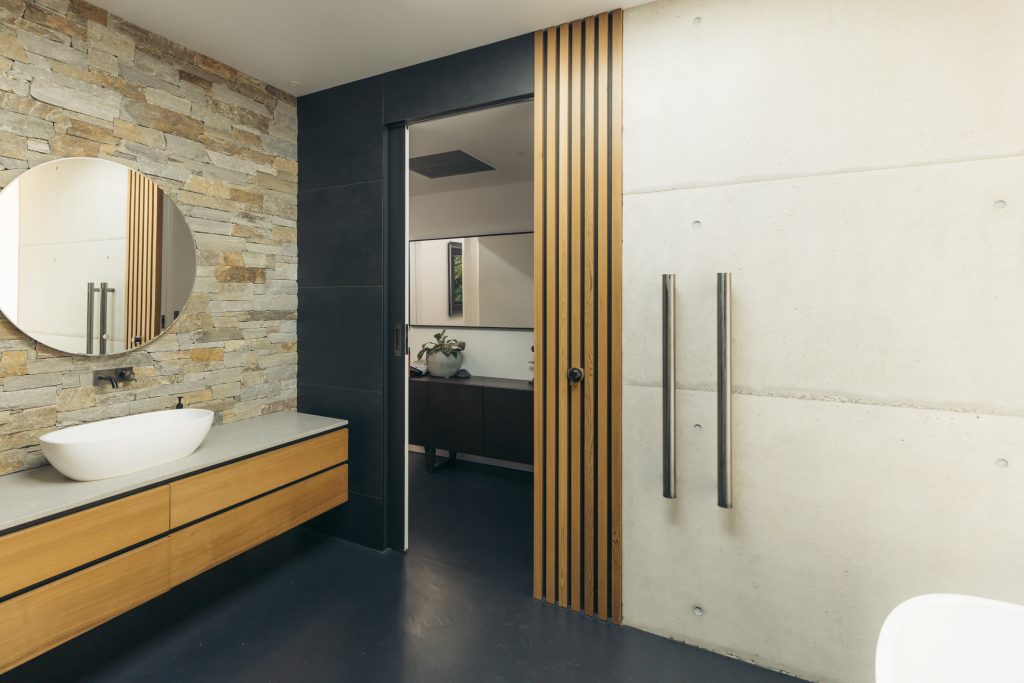
3. Doorway Placement & Full-Width Openings
For sliding doors positioned in hallways or full-width openings, consider:
• What lining will run over the face of the cavity split jambs?
o Options include 10mm plasterboard, 18mm joinery panels, or 10mm tile, which affect the cavity pocket depth when manufacturing, so be sure to nominate at time of order.
• If the door needs to slide out between joinery, should the jambs match the surrounding cabinetry?
• Would you prefer custom jambs or no jambs to fit your own on-site? If so, specify the timber thickness to ensure the correct pocket depth.
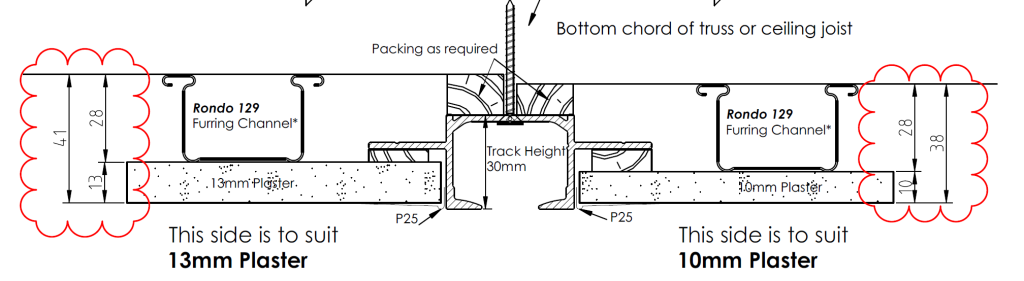
4. Ceiling-Mounted Tracks & Floor to Ceiling Sliding Doors
For a modern, floor-to-ceiling sliding door look, the track must be recessed into the ceiling. Key considerations:
• Our 120kg track system requires 30mm height plus 10mm clearance for adjustments.
• To ensure enough space, we recommend using a 28mm Rondo 129 Furring Channel.
• Check if there is enough ceiling space to accommodate the track before construction.
5. Choosing the Right Door Panel
Standard or custom doors?
• Our Phoenix, Hercules & ProLine cavity units work best with off-the-shelf doors from hardware stores, keeping costs down.
If using our Zero Clearance unit, the door panel must have:
• 85mm or more in top and bottom rails to ensure structural integrity.
• This ensures sufficient strength to support hanger plates and guides.
Internal sliding doors require detailed planning to ensure they operate smoothly and integrate seamlessly into your design. By considering wall thickness, cavity pocket strength, joinery positioning, ceiling space for tracks, and door specifications early on, you’ll avoid costly issues down the track.
Need assistance selecting the right cavity sliding door system for your project? Get in touch with us today to discuss your requirements!